
Whether you’re a biology student, a lab technician, or just someone fascinated by how we decode DNA, Gel Electrophoresis is one of those lab techniques that sparks both curiosity and awe. Think of it as nature’s way of organizing a complex genetic jigsaw puzzle—one tiny electric nudge at a time.
Let’s dive deep into the concept, types, process, and essentials of Gel Electrophoresis, while also uncovering why it’s such a cornerstone of molecular biology.
Concept of Gel Electrophoresis
Gel electrophoresis is a lab method used to separate mixtures of DNA, RNA, or proteins according to molecular size. The process works by applying an electric field to a gel matrix—hence the name. The negatively charged molecules move through the gel towards the positive electrode, and their movement depends on size: smaller fragments move faster, while larger ones lag behind.
It’s like a microscopic marathon, and each molecule has a different stamina level.
Types of Laminar Gel Electrophoresis
While we usually hear about standard horizontal gel electrophoresis, it’s important to note that gel electrophoresis can occur under various airflow-controlled conditions—especially when contamination is a concern. That’s where Laminar Air Flow systems step in. These clean environments ensure your gel results aren’t compromised.
Types include:
- Horizontal Gel Electrophoresis – Commonly used for DNA and RNA.
- Vertical Gel Electrophoresis – Preferred for protein analysis, like SDS-PAGE.
- Capillary Gel Electrophoresis – Used for high-resolution separation; faster and more automated.
These systems are often operated within laminar flow hoods to keep the gel casting and loading sterile, especially in sensitive research and diagnostic settings.
How They Are Made?
The gel matrix used is typically made from agarose (for DNA and RNA) or polyacrylamide (for proteins). Here’s a simplified breakdown of how gels are prepared:
Agarose Gel:
- Agarose powder is mixed with buffer and heated.
- Poured into a mold with a comb to create wells.
- Left to solidify at room temperature.
Polyacrylamide Gel:
- Prepared by mixing acrylamide with a crosslinker.
- Initiators like APS and TEMED are added to start polymerization.
- Requires careful handling due to the neurotoxic nature of unpolymerized acrylamide.
These gels are then placed in a gel electrophoresis chamber, connected to electrodes and run using a buffer solution.
Why Should You Use Gel Electrophoresis?
Here’s why this technique is an essential tool in the scientific toolbox:
- DNA Fingerprinting for forensic analysis
- Genetic testing and mutation detection
- RNA integrity checks before qPCR
- Protein separation for Western blotting
- Plasmid analysis in molecular cloning
- Quality control in biotechnology labs
If you’re working with genetic material, this is your go-to method for visual confirmation.
How Does a Gel Electrophoresis Work?
Here’s the science in action:
- Samples (with dye) are loaded into the wells in the gel.
- An electric current is applied across the gel.
- Molecules move through the gel matrix:
- Smaller molecules squeeze through faster.
- Larger ones drag behind.
- A dye or stain (like ethidium bromide or SYBR Green) makes the bands visible under UV or blue light.
Simple in concept, but deeply powerful in application.
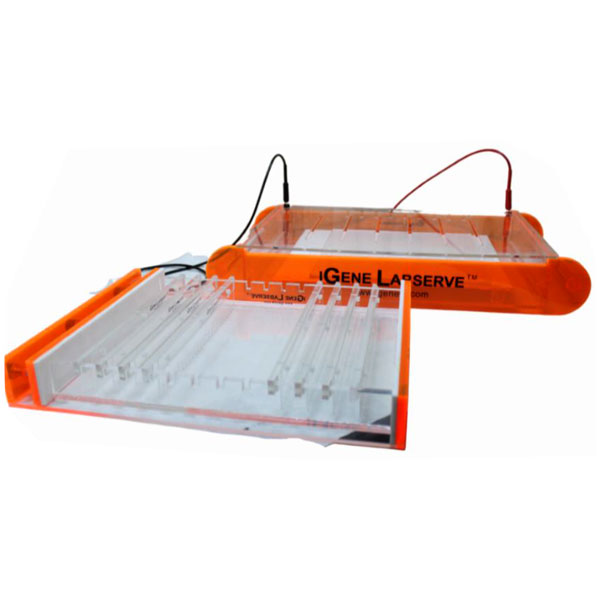
Parts of a Gel Electrophoresis
Understanding its components is key:
- Gel Matrix (Agarose/Polyacrylamide)
- Electrophoresis Tank/Chamber
- Power Supply (for voltage)
- Gel Tray and Comb (to form wells)
- Buffer Solution (like TAE or TBE)
- Loading Dye and DNA Ladder
- UV or Gel Documentation System
Each part works in harmony to deliver clear, interpretable results.
Advantages and Disadvantages of Gel Electrophoresis
✅ Advantages:
- Easy to set up and run
- Inexpensive and widely accessible
- Clear, visual results
- Works with various biomolecules
❌ Disadvantages:
- Limited resolution for very similar fragments
- Can be time-consuming
- Not quantitative unless combined with densitometry
- Ethidium bromide is hazardous (in some cases)
What are the Dos and Don’ts of Gel Electrophoresis?
✅ Dos:
- Wear gloves and lab coat—especially when using stains.
- Use a laminar air flow hood when sterility is required.
- Always include a DNA ladder/marker for reference.
- Check gel orientation before running!
❌ Don’ts:
- Don’t overheat the gel—it can melt.
- Don’t reuse buffer too many times.
- Don’t handle ethidium bromide with bare hands.
- Don’t forget to record your gel image immediately after visualization.
The Bottom Line
Gel electrophoresis is the backbone of modern genetics. It may seem like a basic method, but its precision and simplicity have revolutionized research in genetics, microbiology, forensics, and biochemistry. Whether you’re separating tiny bits of DNA or massive proteins, this technique will guide you like a molecular map.